Maud Humphrey

Maud Humphrey
Showing posts with label Gotz. Show all posts

Thursday, July 9, 2020

Restringing a Vintage Gotz All-Vinyl Baby

I've had this 14 1/2" vintage Gotz baby in my collection for a few years.  She is all vinyl, but also twists at the waist!  I bought her from eBay knowing her joints were loose, but they weren't too bad, so I just left her alone.  As I was straightening up in my doll room today, I came across her and decided that today was the day.  (I was supposed to be cleaning, so I suppose this was my way of procrastinating!)  After I determined I had the right elastic to complete the project, I pulled out an arm and snipped the elastic cord.  Here she is after I removed her arms from her body.  As you can see, they are attached using plastic "cups" that are shoved into the arm holes.  I did use my trusty blow drier to first soften the vinyl before using pliers to pull out the cups.


Next to be cut off were the legs.  The cord actually runs from one leg, up through the torso, into the head, back down he torso, and ends in the other leg.


All the body parts


I simply shoved the elastic through the cup and knotted the end.  This is how it was assembled originally.


I shoved the cup with the knotted cord back into the leg hole.  Then, the cord was threaded up through both torso pieces.  I decided to cut the cord at the top and then repeat the process with the other leg.  The originally assembly had the cord doubled over at the top and then knotted, but I thought this would be a little more difficult to shove the tightened cup up into the head cavity.  


I decided to replace the original, plastic cup in the head with this trusty button, instead.

The back side of the shank button.  I have used these buttons for many, many doll restringing projects.  I got them at JoAnn's.  Last time I was there, they still had them.


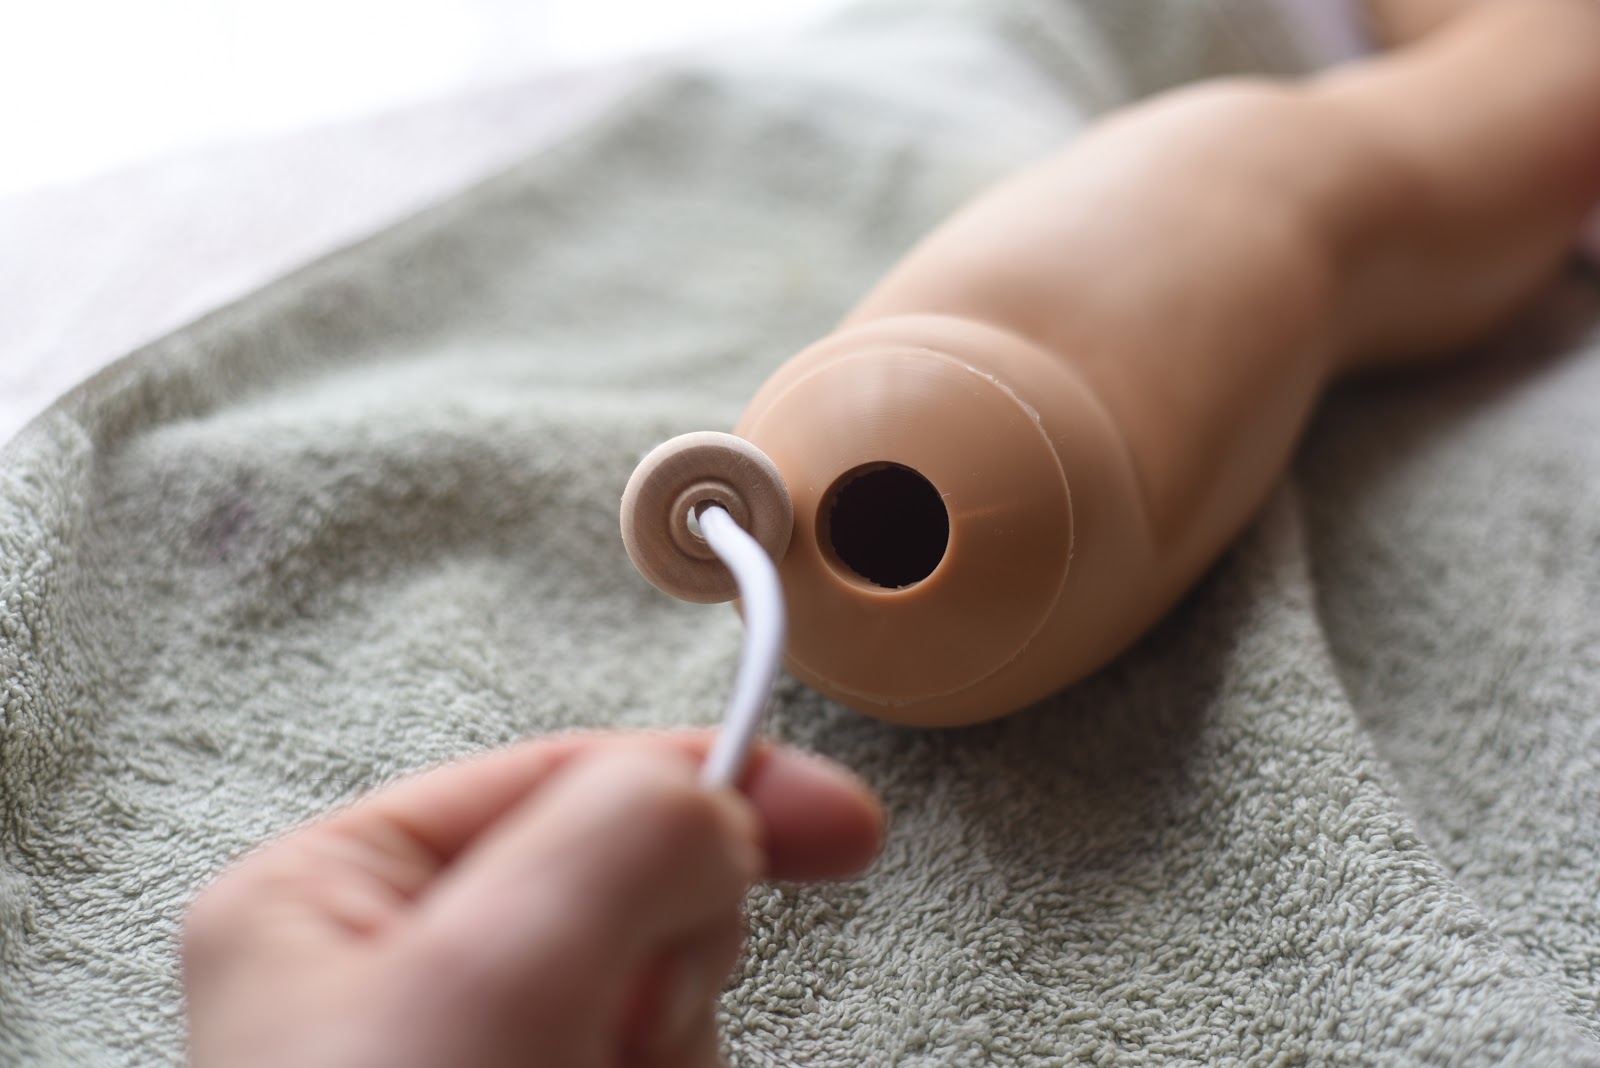
I threaded the elastic from one leg through the shank button.  The button was then shoved up into the head.  Then I tied both ends of the elastic cord together and pulled them as tightly as I could.  Once I knotted them, I clipped off the ends and the head was now nice and secure!


The last thing to string was the arms.  Again, I knotted the elastic after threading it through one cup, and then shoved the cup into the arm cavity.  The elastic was then threaded through the body and into the remaining cup.  I pulled it tight and then knotted it.  This last part is the probably the most awkward...now I had to shove the tightened cup into the other arm cavity.  But with a little bit of brute force and a trusty pair of pliers, I got it done!


All done!  Baby can hold a pose again!


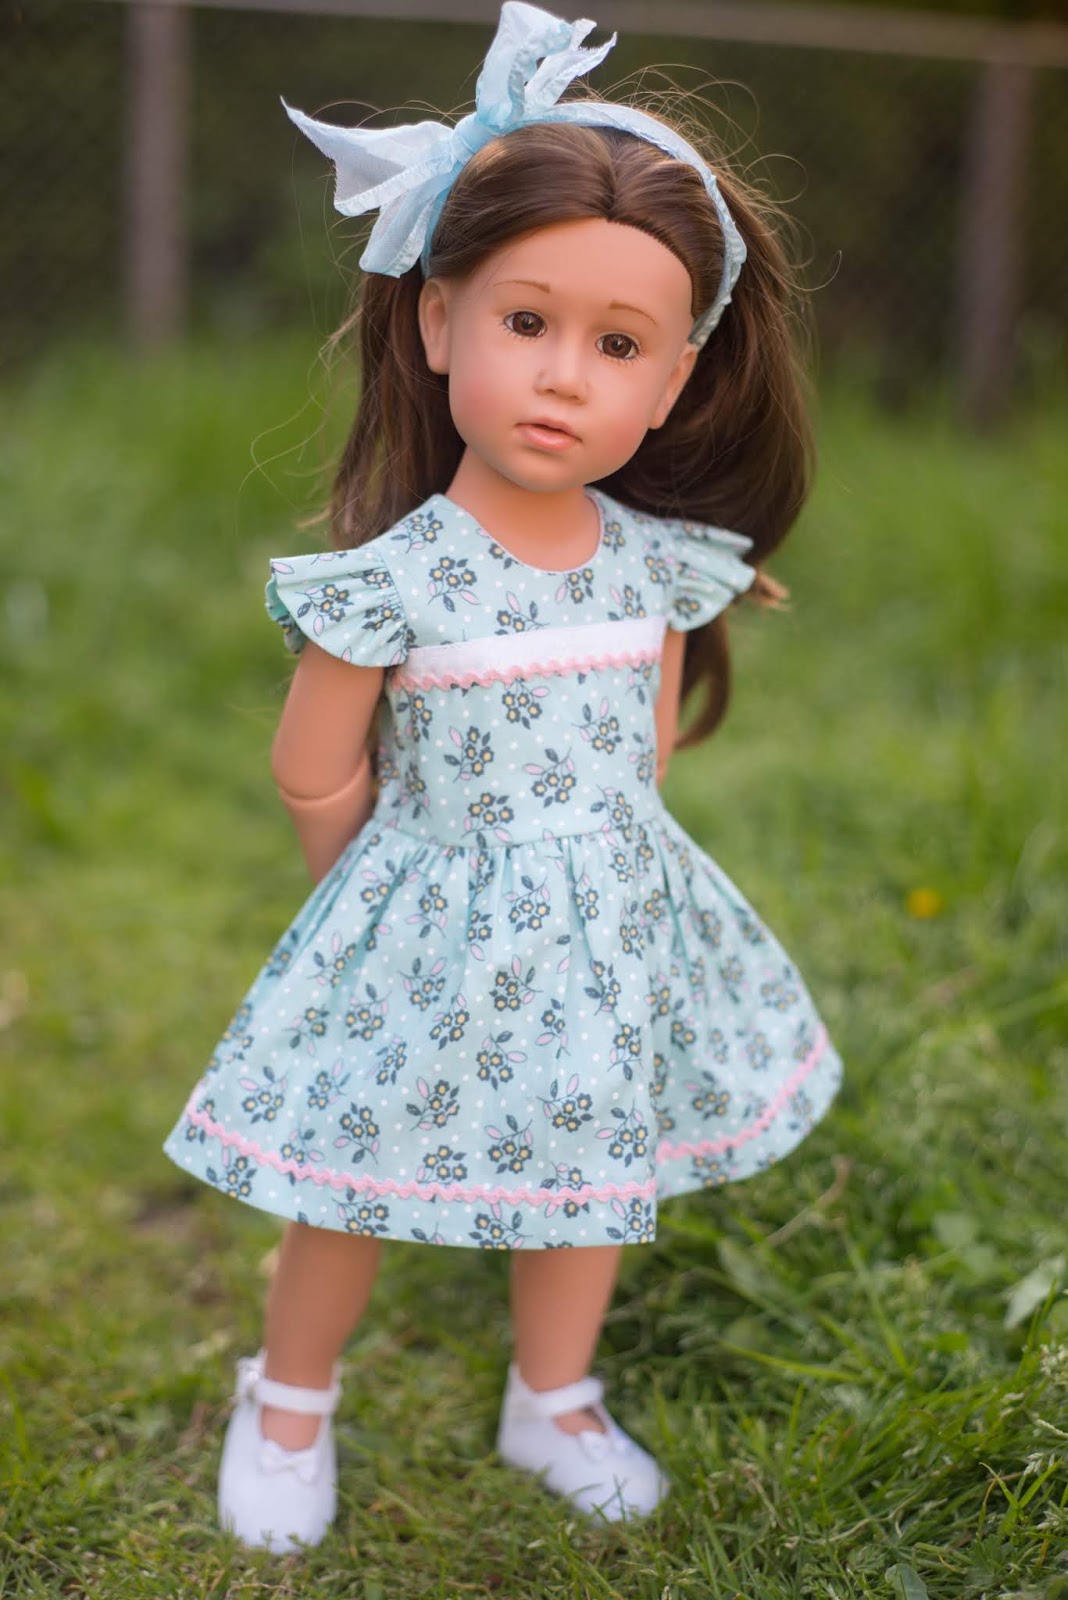
I redressed her in her original outfit, which consists of a knitted sweater, a matching hat, and a sleeveless, long-legged bodysuit underneath.  I wasn't completely in love with it, so I decided to add a sweet, pink taffeta dress and bloomer panties which I pulled off a thrift store doll long ago.  How cute is she now?!?


She's such a little pumpkin now!  I love her.  I have another one just like her, but with blonde hair.  That one came to me nude, so I will have find/make her some clothes and then I can share "the twins" with you.  It's amazing what a little rehab and some cute clothes can do!


And speaking of cute...here are my two English Budgies, Pippin and Bobbin.  They like to hang out on my lap top while I peruse the internet.  Here, Bobbin is preening Pippin.  They are such sweet birds, and great company in my sewing/doll room!


Wednesday, May 29, 2019

Some Dolly Rehab & Repair

I've been doing a bunch of repair and restoration lately.  It's been very gratifying to identify a problem and figure out how to fix it!  

These 24" Gotz dolls (signed and numbered by Marianne Gotz on their torsos) had both lost a leg.  I wish I had taken a "before" picture, but I forgot.  So you'll just have to take my word for it that one lost a left leg, and the other a right!  The elastic had simply worn out and the leg popped off.  Their other limbs were also a bit loose.  Their limbs are joined to their bodies just like American Girl dolls, with plastic cup joints and elastic secured with crimping sleeves.  One of the dolls was totally missing the cup joint inside her leg.  I have no idea where it went, or how it could have even come out of her leg in the first place, as you have to heat up the limbs and use pliers to pry it out!  But somehow, it was gone.  So now I had to figure out how to create a new cup joint.  I could have gone online and bought replacements, but they cost around $4 a piece, and I wanted it NOW.  So I took one of the legs and headed towards our friendly, neighborhood hardware store.

The awesome employee ran all over the store, trying to find something that was roughly the same diameter as the cup joint which had a hole in the middle that could be fit back into the leg.  He came up with this pack of screen door wheel thingies.   Once I got back home with them, it also occurred to me that maybe a large, wooden bead might work?  So I dragged out my box of wooden beads, wheels, and other such items which I've saved for future craft projects.  And guess what?  I discovered that the 1" diameter wooden wheels worked perfectly.

Here are the items I used to restring my doll's leg:  the wooden craft wheel (found at most craft stores), elastic stringing cord, and a crimper (also called a ferrule) from the hardware store.

Thread the crimper onto the elastic cord and use your pliers to squash it flat so it won't move.  Next, add the wheel.


I don't have a picture of this next step, but now you'll want to shove the wheel into your doll's joint.  I did this by heating up the leg opening slightly with a blow dryer until it was somewhat pliable.  Now I could shove the wheel (crimper end first) into the hole.  Make sure and hang onto the elastic so that the whole thing doesn't disappear into the leg!


Next, feed the elastic through the hole into the body.  I still had the cup joint for this end, so that's what I used.  But if you are totally missing it, use another wooden wheel!

After I finished repairing the broken leg, I went ahead and just replaced all of the other arms and legs with new elastic as well.  I figured that their elastic was probably on borrowed time, so I may as well fix it now rather than later, especially since I had gone to the trouble to remove all that stuffing.  And there was a lot!


After I got my pretty girls tightly strung and back in one piece, I noticed their facial coloring had faded over the years as well.  So out came my pastel chalk pencils and cotton balls.  Now they have sweet, rosy cheeks again!
These dolls do have their original outfits, but I plan on making them some new dresses soon, which is why they're standing here in their birthday suits.

And just a note:  The cup joints for these 24" dolls were the exact size as the cup joints in my 18" dolls, so this method works for both.

Another note:  It just occurred to me that I never showed a picture of the cup joints:
The white cup is what is in most dolls that use these joints.  The larger, flesh-toned one was an extra that was inside the legs of these two dolls.  I pulled them out and did not reuse them.  I just used the wooden wheels, and it worked great!

And a third note:  While I didn't end up using the screen door wheels for this project, I did use them to replace the cup joints on an 18" doll, and they worked just fine.

Next on my rehab list was this sweet, vintage, 20" Betsy Wetsy Doll I found at Goodwill for $4.  She was absolutely filthy.  And sticky.  And filthy.  Did I already mention that she was really dirty?!?
But I could definitely see her potential.


Here's a close up of her dirty little foot.  This is what her entire body looked like.

Marked IDEAL DOLL VW-4 on the back of her neck

I used baking soda and water to scrub off the filth.  Then I wiped her down with rubbing alcohol to remove any final residue.  Her hair was washed and conditioned.  She came out squeaky clean!  

I used a vintage pattern for dolls her size and made this darling little dress:


The back closes with snaps, covered with decorative buttons.

She even got a pair of matching bloomer panties!

By the time I was all done with her, I had kind of fallen in love and wanted to keep her!  But alas, I just don't have room for them all, and I bought her for the purpose of selling her, so that's what I did.  She was listed on Ebay and sold very quickly.  I hope her new owner loves her as much as I did!

Another recent find at Goodwill was this Wellie Wisher doll, Emerson:
I was digging through the over-packed stuffed animal shelf when I spied the pink wellies...

I pulled her out legs first from among the stuffed animals and this is what greeted me!  Poor little thing...her face was covered in some sort of make-up(?).  Her eyes are dull and cloudy.  And her black eyelashes and eyeliner had been removed.  Why?  Just...WHY?!?  I knew she needed my help, so for $3.99, into my cart she went.

She has an original, Wellie Wisher extra outfit, underwear, and her boots.  She's in good shape, except for her face.


In this photo, I have cleaned off the right side of her face.  I'm happy to report that it all came off very easily with a little baking soda and water.

Here's a comparison photo with her and my own Emerson.   You can clearly see she is missing all of her eye make up, and that her eyes are dull.  I'm assuming that whatever her previous owner used to strip off her makeup, also took the shine from her eyes.  I plan on replacing her eyes.  I am going to go to Goodwill later today and hopefully find an "eye donor" from among the many porcelain dolls.  I will also try redoing her eye make up with my black chalk pencil.  I recently ordered some Mr. Super Clear matte fixative spray from Amazon, and it is supposed to arrive tomorrow.  So as soon as that arrives, I will be able to seal my work.  

Stay tuned for the final results!


Sunday, April 28, 2019

New Etsy Listings for 18" Slim Body Dolls

A few months ago, I decided to make a bunch of dresses for the 18" slim-bodied dolls in my collection.  I made 10 all at once, and used some of them to dress the naked dolls that I wanted to list on Ebay.  These are the left-overs, which I just listed in my Etsy store!  They will fit the 18" Gotz Happy Kidz, Classic Kidz, and Hannah; also Journey Girls and Magic Attic Dolls.

Gotz Classic Kidz VRONI is shown here with my favorite version of all the dresses.  Probably because it's pink.  And floral.   And has white, dainty, cluney lace.  All the things I love!


Aren't those flutter sleeves just the sweetest?

Gotz Hannah

I found this sweetie at Goodwill several years ago.  Can you imagine someone donating her?!?  She is just so darling.

I never bought much fabric at JoAnn's because I didn't think their quality was as nice as the quilting store fabrics.  But lately they've been upping their game, coming out with "premium cottons" in delightful prints.  I just fell in love with this parasol print when I saw it.  Of course, I only bought one yard, and then it disappeared, never to be seen again.  So the moral of this sad story is:  ALWAYS buy more yardage than you think you'll need, because you'll probably never find it again!


Journey Girls CALLIE

I found his cutie at Goodwill, too.  Her face is just so pretty.

The print has a 1930's vibe to me


Magic Attic Megan

Another Goodwill find!  I was going to sell her, but then I fixed her up and fell in love with her cute little face.  Her hair is soft and silky.  She is the slimmest of all these dolls, but the dress still fits her fairly well.

I just love this Mickey/Minnie fabric!


Gotz Happy Kidz Charlotte

What a pretty girl...I could stare at her face all day

I believe she was sculpted by Sissel Skille for Gotz


All of the 18" slim-bodied doll dresses I have available--this photo took me forever to get.  It was windy this afternoon, and our yard is very bumpy and uneven.  Trying to get all six dolls to hold a pose and not blow over in the wind was a challenge!

18" BFC Ink Doll, YUKO

I made several of these dresses for the naked BFC Ink dolls I was selling, and this was an extra.

I designed this pattern several years ago, because Yuko has very different body from other 18" dolls.  She is multi-jointed and very slender, with a teenage figure.  I created the bodice with two darts in the front and two in the back so that it fits her body perfectly.


I usually sell all of the BFC Ink dolls I come across, but I had to keep this one.  I am partial to Asian sculpts, and this one is just so pretty.

My girls are ready for spring, and hopeful that the warm, sunny weather decides to stick around for awhile!

You can find these dresses and more in my Etsy shop!