
I've been doing a bunch of repair and restoration lately. It's been very gratifying to identify a problem and figure out how to fix it!

These 24" Gotz dolls (signed and numbered by Marianne Gotz on their torsos) had both lost a leg. I wish I had taken a "before" picture, but I forgot. So you'll just have to take my word for it that one lost a left leg, and the other a right! The elastic had simply worn out and the leg popped off. Their other limbs were also a bit loose. Their limbs are joined to their bodies just like American Girl dolls, with plastic cup joints and elastic secured with crimping sleeves. One of the dolls was totally missing the cup joint inside her leg. I have no idea where it went, or how it could have even come out of her leg in the first place, as you have to heat up the limbs and use pliers to pry it out! But somehow, it was gone. So now I had to figure out how to create a new cup joint. I could have gone online and bought replacements, but they cost around $4 a piece, and I wanted it NOW. So I took one of the legs and headed towards our friendly, neighborhood hardware store.

The awesome employee ran all over the store, trying to find something that was roughly the same diameter as the cup joint which had a hole in the middle that could be fit back into the leg. He came up with this pack of screen door wheel thingies. Once I got back home with them, it also occurred to me that maybe a large, wooden bead might work? So I dragged out my box of wooden beads, wheels, and other such items which I've saved for future craft projects. And guess what? I discovered that the 1" diameter wooden wheels worked perfectly.

Here are the items I used to restring my doll's leg: the wooden craft wheel (found at most craft stores), elastic stringing cord, and a crimper (also called a ferrule) from the hardware store.

Thread the crimper onto the elastic cord and use your pliers to squash it flat so it won't move. Next, add the wheel.

I don't have a picture of this next step, but now you'll want to shove the wheel into your doll's joint. I did this by heating up the leg opening slightly with a blow dryer until it was somewhat pliable. Now I could shove the wheel (crimper end first) into the hole. Make sure and hang onto the elastic so that the whole thing doesn't disappear into the leg!
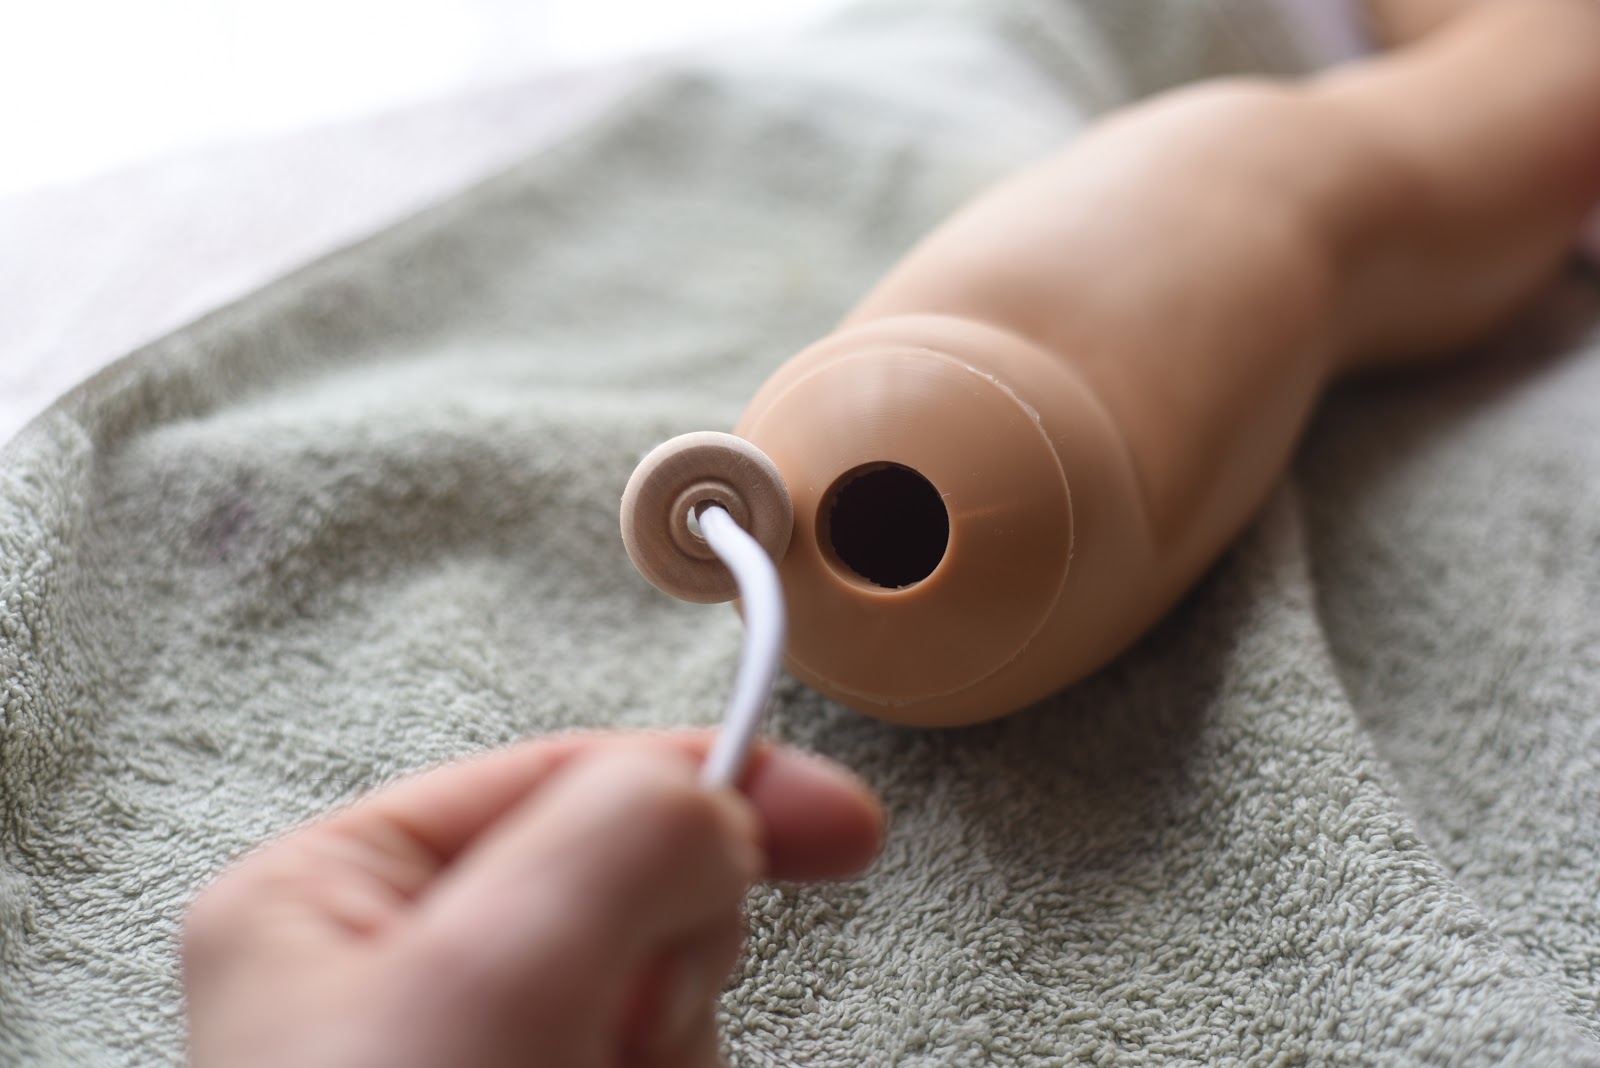

Next, feed the elastic through the hole into the body. I still had the cup joint for this end, so that's what I used. But if you are totally missing it, use another wooden wheel!
After I finished repairing the broken leg, I went ahead and just replaced all of the other arms and legs with new elastic as well. I figured that their elastic was probably on borrowed time, so I may as well fix it now rather than later, especially since I had gone to the trouble to remove all that stuffing. And there was a lot!

After I got my pretty girls tightly strung and back in one piece, I noticed their facial coloring had faded over the years as well. So out came my pastel chalk pencils and cotton balls. Now they have sweet, rosy cheeks again!

These dolls do have their original outfits, but I plan on making them some new dresses soon, which is why they're standing here in their birthday suits.
And just a note: The cup joints for these 24" dolls were the exact size as the cup joints in my 18" dolls, so this method works for both.
Another note: It just occurred to me that I never showed a picture of the cup joints:

The white cup is what is in most dolls that use these joints. The larger, flesh-toned one was an extra that was inside the legs of these two dolls. I pulled them out and did not reuse them. I just used the wooden wheels, and it worked great!
And a third note: While I didn't end up using the screen door wheels for this project, I did use them to replace the cup joints on an 18" doll, and they worked just fine.
Next on my rehab list was this sweet, vintage, 20" Betsy Wetsy Doll I found at Goodwill for $4. She was absolutely filthy. And sticky. And filthy. Did I already mention that she was really dirty?!?

But I could definitely see her potential.

Here's a close up of her dirty little foot. This is what her entire body looked like.

Marked IDEAL DOLL VW-4 on the back of her neck

I used baking soda and water to scrub off the filth. Then I wiped her down with rubbing alcohol to remove any final residue. Her hair was washed and conditioned. She came out squeaky clean!
I used a vintage pattern for dolls her size and made this darling little dress:


The back closes with snaps, covered with decorative buttons.

She even got a pair of matching bloomer panties!

By the time I was all done with her, I had kind of fallen in love and wanted to keep her! But alas, I just don't have room for them all, and I bought her for the purpose of selling her, so that's what I did. She was listed on Ebay and sold very quickly. I hope her new owner loves her as much as I did!
Another recent find at Goodwill was this Wellie Wisher doll, Emerson:

I was digging through the over-packed stuffed animal shelf when I spied the pink wellies...

I pulled her out legs first from among the stuffed animals and this is what greeted me! Poor little thing...her face was covered in some sort of make-up(?). Her eyes are dull and cloudy. And her black eyelashes and eyeliner had been removed. Why? Just...WHY?!? I knew she needed my help, so for $3.99, into my cart she went.
She has an original, Wellie Wisher extra outfit, underwear, and her boots. She's in good shape, except for her face.


In this photo, I have cleaned off the right side of her face. I'm happy to report that it all came off very easily with a little baking soda and water.

Here's a comparison photo with her and my own Emerson. You can clearly see she is missing all of her eye make up, and that her eyes are dull. I'm assuming that whatever her previous owner used to strip off her makeup, also took the shine from her eyes. I plan on replacing her eyes. I am going to go to Goodwill later today and hopefully find an "eye donor" from among the many porcelain dolls. I will also try redoing her eye make up with my black chalk pencil. I recently ordered some Mr. Super Clear matte fixative spray from Amazon, and it is supposed to arrive tomorrow. So as soon as that arrives, I will be able to seal my work.
Stay tuned for the final results!
No comments:
Post a Comment