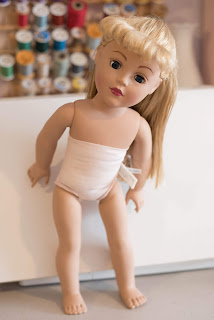
After my last post describing how I go about repairing a broken limb on a Journey Girl, it reminded me that I still hadn't posted about how I fix broken heads on these shoulder plate dolls. So here you go. This is a pretty little gal I picked up at the thrift store strictly because I liked her clothing. Getting a complete outfit, plus shoes for only $3.00 seemed like a pretty good deal! I figured I could keep the clothing and donate the doll back to the thrift store, but only after I fixed her wobbly head.
Her stuffing had also settled in such a way to where she couldn't stand up straight, poor thing.
First order of business: open back seam and pull out all the stuffing. Set aside.
Using sharp scissors, pull the head away from the neck and clip the stringing elastic.
Pictured here is the plastic cup that was up inside her head. Use a blow dryer to heat the vinyl for a few minutes so that it becomes pliable enough so you can pull out the cup with a pair of pliers. Thread with new stringing elastic and attach a crimping sleeve to the end as shown. Now, shove this cup back up into the head, extending the long, loose end of the stringing elastic through the neck and into the body cavity.
Now, this is where the fun part begins: string the cup hook that was in the body, followed by a couple of wooden spools (or however many you need), and then another crimping sleeve. Pull everything nice and tight up against the neck cavity. The reason you need the wooden spools is because the body cavity is too small to effectively reach up with a pair of pliers and squish the crimping sleeve, so adding the spools give you more room to work. I have heard from people who have actually tightened these dolls' heads without stringing on extra length in the form of spools like I have, but they have also said that it was one of the hardest things they ever did and many curse words may have been uttered!
After you have pulled the stringing cord as tight as you can, squish flat the crimping sleeve at the base of the wooden spool. Re-stuff the body. I added extra stuffing I had on hand so she could stand without slouching. Stitch up the back seam.
And here she is, good as new! Her head is nice and tight again, and she can stand on her own without looking like she's crippled. Easy peasy. I suppose this would work with most 18" dolls with shoulder plates, although the Journey Girl doll I worked on in the last post had a bottom plate in her chest area, so this would have needed to be cut out first in order to access the head. Hope this works for you!


Another great job! Well done! :o)
ReplyDelete~Carolyn
Thank you! As they say, "Necessity is the motherhood of invention". I clearly had to come up with something!
DeleteDo my life dolls head repair the same?
ReplyDeleteGood question! I've never had the opportunity to work on one, so I don't know. But I would guess that the construction is most likely the same. I will have to start looking for one at the thrift stores so I can take it apart and report back!
DeleteThis is absolutely perfect mirror of my )2 dollar doll from thrift store. No clothing and damaged same way. Thank you. Just need to find crimping and elastic supplies suitable for repair.
ReplyDelete