Maud Humphrey

Maud Humphrey

Sunday, August 12, 2012

McCall's 5292--A New Dress for Me

When we got home from church this evening, I remembered that I had not yet posted about this dress.  So I quickly handed my daughter the camera and we managed to get a few decent shots before the light was totally gone.  I'm hating that it's getting darker earlier and earlier again!  Didn't summer just start?  I'm not ready for fall yet, even though my calendar keeps reminding me that school starts up again in a just a few short weeks.  Anyway, on to the dress...

I've had this pattern in my stash for quite a while now.  I always thought it was cute, but for some reason, I never made it until now.  I'm so glad I did!  I wore it to an outdoor wedding last night, and to church today.   I love the way it turned out, although there are some definite changes I had to make in order for it to fit me correctly.

I decided on view C.  First, I cut a mock bodice in the size indicated on the back of the envelope, according to my measurements.  This happened to be a size 18.  However, it turned out HUGE!  I immediately assessed the situation and determined that I needed to cut two different sizes--a size 12 for the upper bodice, and a size 16 at the waist.  Now, the fit in the bodice was fine, but the neckline was still much too wide, and the straps were too narrow for my liking and kept falling off my shoulders.  So the biggest change I made to this pattern was widening the shoulder straps and moving them over a bit.  In retrospect, I wish I would have moved them over even farther, because they still tend to want to slide off my shoulders a bit.  And my bra straps always want to peek out in the back.  I hate this!  So in the meanwhile, I correct this problem with safety pins, but I've been busily thinking about other ways to permanently fix this.

In this back view, you can easily see how close the straps sit to the edge of my shoulders.  If I make this dress again (and I probably will), I will definitely move them further in. 


Even with the strap issues, I really do love this dress.  I used a quilter's cotton by Robert Kaufman called "Flower Shop, and I lined the entire dress with a 100% cotton Ralph Lauren sheet that I picked up at Goodwill for a few dollars.  Re-purposed sheets are wonderful for sewing projects, and so much cheaper than buying comparable fabric off the bolt.  I LOVE lining the skirts of my dresses--they just hang so much nicer, and you don't have to worry about wearing a slip.

And speaking of weddings (I DID mention that we went to a wedding yesterday, didn't I?) here's a picture of my little flower girl in action.  We couldn't have asked for a better performance.  Of course, being that she's only three, I didn't think it would hurt to bribe her a bit with the promise of a set of Polly Pocket Disney Princess dolls.  She smiled.  She strolled.  Flower petals were scattered with great determination.  Success.  And of course, she looked adorable.  What more could be asked for in a flower girl?

Tuesday, July 31, 2012

Second Flower Girl Dress...Completed!

Finally, after long last, it is finished!

I honestly don't know why I put it off for so long, except for the fact that I like to procrastinate.

I'm extremely pleased with how it all turned out.  The smocking is the same pattern that I did for the smaller dress.

The original dress would have been super-simple to construct, but I had to complicate things by smocking the bodice and adding an underskirt.   Since the dress is fully lined, I essentially made two dresses and stitched them together.

As you can see, it's got great "twirl-a-bility".  Pay no attention to big brother on the porch, who somehow kept scootering into my pictures.

Close-up of the sweet buttons.

She loves her dress.  It's always so satisfying for me as a seamstress to finish an outfit that she can't wait to wear.

Sophie and her "doll of the day".  Which is really one of my dolls, but in our house, she considers every doll her doll.  This particular one is by Heidi Ott.
 
Now that these dresses are done, I can confidently say "bring on the wedding"!

Have a great evening!


Monday, July 30, 2012

One Flower Girl Dress...FINISHED!

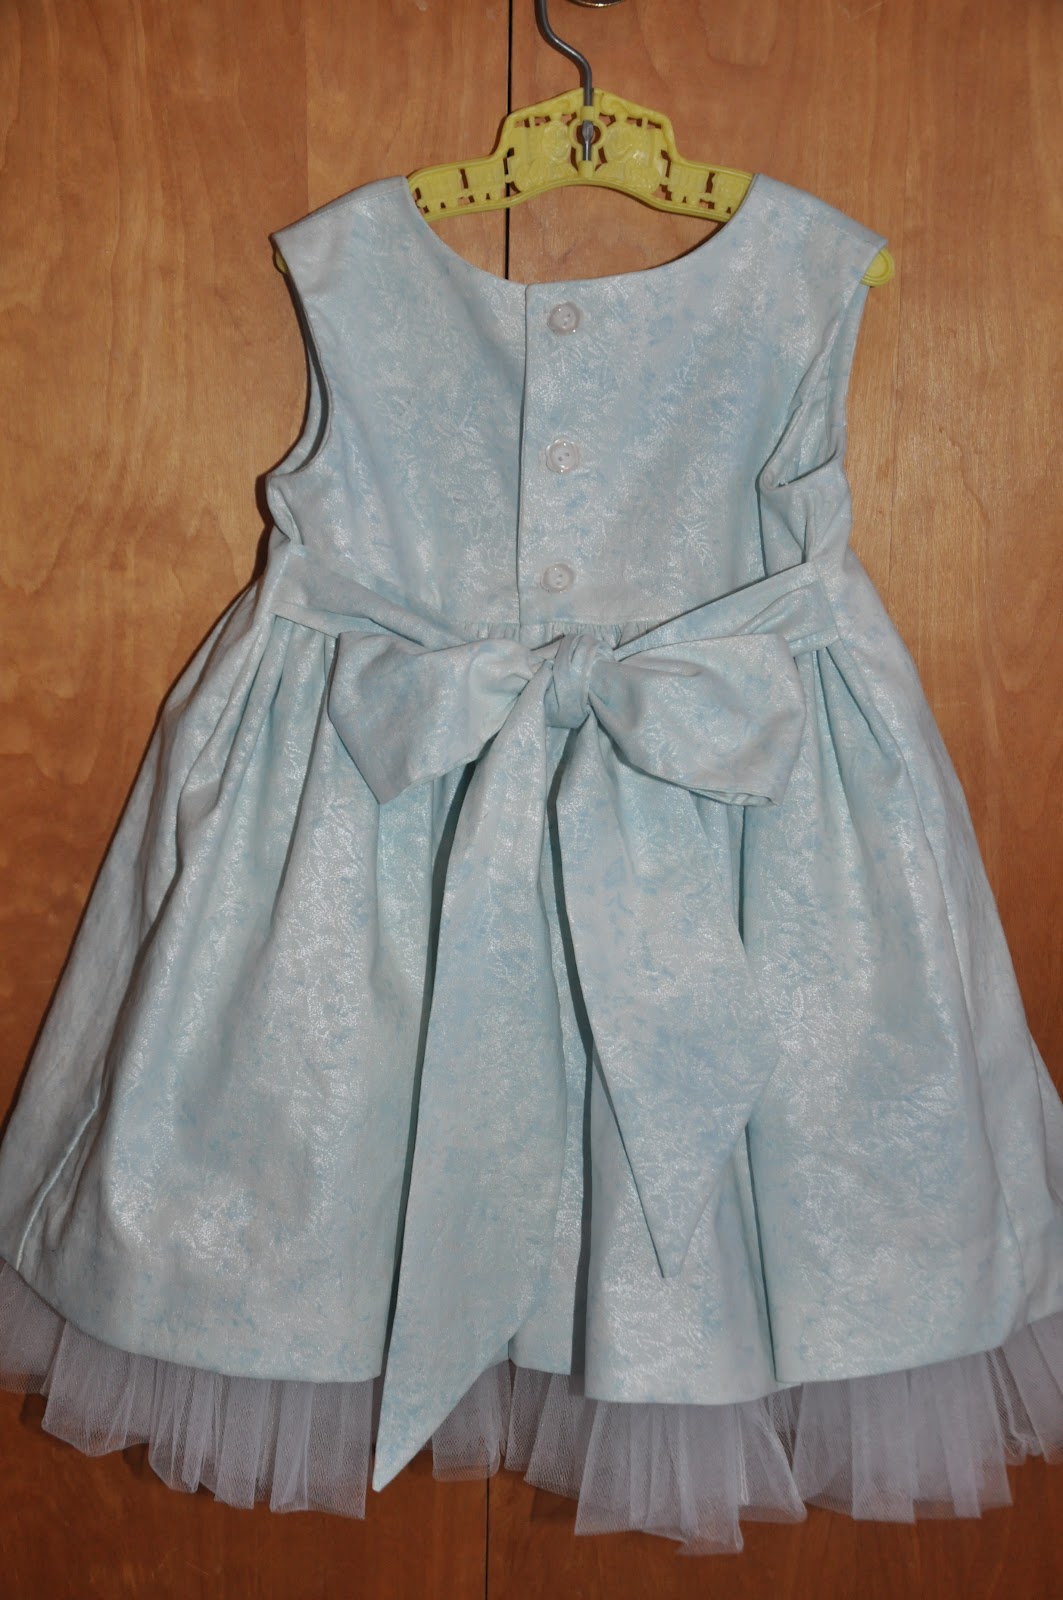
Well, I had hoped to have both flower girl dresses done by now, but it just hasn't happened.  I am really close, though!  I did complete the dress for the other little girl today, just in time to take it to the bridal shower where I then handed it over to the mother.  Everybody in attendance at the shower had to oooh and aaah over it, which in turn made me feel like all the hard work was definitely worth it.  The smocking didn't take as long as most people might think--maybe about 4 hours per dress?  The entire dress is fully lined, and a tulle ruffle is added to the underskirt.  That was my least favorite part.  I love working with natural fibers, but tulle?  It seemed like it took forever to gather up what felt like miles and miles of the sheer stuff.  However, now that it's all said and done, I love the effect.  So dainty and feminine.

A close up of the smocking and embroidery.  I used a basic, sleeveless dress pattern for the bodice, and then cut the front bodice in half horizontally about 2 1/2" down from the neckline.  The upper skirt portion, which is smocked, is attached to this smaller bodice piece, creating the complete dress front.  I taught myself to smock about 15 years ago, when I had my first daughter.  There's a wonderful publication, called AUSTRALIAN SMOCKING & EMBROIDERY, which was invaluable in teaching me how to smock.  It comes out quarterly, and each issue contains many beautiful patterns.  Unfortunately, this magazine is about to put out it's final issue, but you can still buy many back issues on Ebay, or from smocking stores online.  Definitely look into it if you are intersted in smocking!  SEW BEAUTIFUL is another great magazine that is full of heirloom sewing projects and smocking ideas.

The back view.  I toyed with the idea of making the sash out of tulle, also, but after fussing with the skirt ruffle, I'd had enough!  So I opted for the cotton sash instead. 

I should have Sophie's dress finished tomorrow.  And then I will take pictures of her modeling it.  A dress hanging on a hanger is cute, but on a real live child?  Scrumptious.  I can hardly wait for her to wear it at the wedding.

Saturday, July 28, 2012

Hikes, Blueberries, and a Smocking Sneak-Peek

Hubby and I took the five younger kids out to my Dad's place today.  We hadn't visited in a while, and the kids love going out there.  His property borders forest land, so there are plenty of trails to explore.

We decided to hike the trail that takes you to the top of "the mountain".  It's pretty long and steep, but Sophia hiked along just like the big kids.

Here's a peek-a-boo view from the top...isn't it pretty?  Actually, there used to be a much better view of the entire valley beyond, but the trees have grown up quite a bit since the last time we came up here.

Coming back down the mountain...Sophia was getting pretty tired by then and wanted me to carry her, but I convinced her to just hold my hand.  She did great!

It's so pretty back in these woods.  I wished we could just pitch a tent and camp there for a while.

Someday I hope to live in a  place that's as wonderful as this.  In the meanwhile, we'll just have to visit my dad more often!

My dad has wonderful blueberry plants that were ripe for the picking.  We must have picked at least 15 pounds.  And that's not counting the pounds we ate straight off the bushes!

And lest you think I haven't been doing any sewing, rest assured that I have.  Here is a sneak peak of the smocking and embroidery I have completed on both the flower girl dresses.  They are almost finished.  The fabric is so pretty.  It's a Michael Miller print called "Fairy Frost" in a 100% quilter's cotton, but it has a lovely sheen.  Just perfect for a wedding.  The bride chose robin's egg blue as one of her colors, and this fabric was exactly the shade she wanted.  I hope to have both dresses finished by tomorrow and will definitely post pictures more pictures then.

Hope you had a wonderful day.  My shadow bids you good-bye!

Monday, July 16, 2012

Butterick 5603 and Another New Dress

On Saturday afternoon, Natalie begged me to make her a new dress for Sunday.  We had picked out the quilter's cotton fabric earlier in the week at our favorite local craft store.   I started cutting out the pattern at 5:00pm, and had it almost completely finished by midnight.  I was so ready to be done with it!  The pattern didn't look too difficult when we initially purchased it, but the crossover bodice (view C) gave me fits!  I don't know if it was because I was so tired, or if my brain just wasn't "getting it", but I worked on that bodice longer than the entire dress combined.   I finally did figure it out, just in time, because I was almost ready to chuck the entire thing into the garbage!

This is the pattern we used, Butterick 5603, a "retro design from '56".  Based on my daughter's measurements, we cut out a size 14.  I made a mock bodice first, just to be sure of the fit, and boy, am I glad I did!  The bodice was HUGE.  And because it was the smallest size in this envelope, I couldn't size down.  So I ended up cutting off 1 1/2" inches from each edge of the bodice and the side skirt pieces.  Luckily, this did the trick, and the fit was fine everywhere else.  Not sure why this pattern runs so big, but beware in case you decide to tackle it.

Here's a side view.  Oh, to have the figure again of a fifteen-year-old with no figure flaws!  She looks so cute in everything she wears.  However, she did NOT want me to show her head, since she didn't think her hair looked presentable.  Remember those days?!?  Anyway, I had just enough time on Sunday morning to finish hand stitching the lining.  The dress closes on the side with an invisible side zipper.  She happily wore it to church and got so many compliments.  She is already asking me to make her another one, preferably view A this time.  I'm actually even contemplating making one for myself!

Remember the Sew Beautiful "Mary Morgan" dress I made for myself a couple of months ago?  Well, I liked it so much that I made myself another one, only a bit simpler this time.  The first dress was adorned with vintage laces, had two layers, and was tea-length.  This dress is made from a quilter's cotton in a shorter length.  I used a coordinating fabric for the waistband, and also to edge the sleeves.  I LOVE it.  It fits so nicely and is a joy to wear.

Here's a back view.  Not sure why, but the waistband looks like it dips a lot, when it's really quite straight.  Must have been the way I was standing.


And now, for some total randomness...do your kids ever take pictures with your camera when you're not around?   I get such a kick out of what they think is "picture worthy"!  So here we have photo #1, which I have titled "dominoes".  (I know, pretty clever, huh?)

Photo #2, "the birds".  You can definitely tell a "little" person took this picture, simply from the angle.

And last but not least, my favorite...photo #3... we shall call "carpet".   Not sure what we're looking at here, other than dirty carpet.  Makes me wonder what my little person was thinking when this photo was snapped!


I have another "Emmeline" Apron for myself that is almost completed, and I REALLY need to start cutting out the pieces for the flower girl dresses that need to be ready by August 11th.  I think I'm going to smock and embroider them, also, so I need to get busy.  It's been a long time since I smocked something, and I'm looking forward to it.   Hopefully, I'll be back soon with these completed projects!

Saturday, July 7, 2012

The Emmeline Apron and Oven Mitts


I bought this pattern a while ago because I love aprons and I just thought this one was so darn cute.  Feminine, but not too frilly.  I finally got around to making it as a shower gift for the daughter of a very dear friend who is getting married next month.

One of the things I love about this pattern is that it is reversible.  Here I am, modeling the floral side...

...and here's the reverse side in a pretty green.  I love that the ties can wrap around and tie in the front.  This is a very figure flattering style, I think.  I made it just like the pattern instructed, since it was my first time.  However, when I make it again (and I will, because I need one for myself!), I will make a couple of changes:  I will make the waistband ties a bit narrower, and I will turn the neck ties into one continuous strap so that they never need to be tied.   I would probably also add pockets.   Other than that, I think this apron is pretty darn near perfect.  I have another bridal shower to attend at the end of this month, so I will probably make this again as a gift.  It goes together fairly quickly and the instructions are pretty simple.

I purchased extra fabric so that I could make matching oven mitts.  Isn't the green mushroom fabric whimsical?  I used a free pattern off the internet.  The first mitt almost ended up in the garbage because I had such a hard time turning it inside out after sewing it together!  There are a lot of layers in these mitts;  each side of each mitt has five layers--the outer fabric, the lining, an insulated batting, and two layers of cotton batting.  This means that you are sewing through ten layers when you stitch the front to the back!  I probably could have omitted one of the cotton batting layers, but even so, I still would have had eight layers to work with.  Sewing them together was not the difficult part, but turning them inside out gave me a workout!  Once I completed that task, I sewed a continuous binding around the top edge and than hand sewed it down for a neat look.  I do like how they turned out, and would definitely love some new mitts for my kitchen.  My current ones are so ratty and gross looking.  Plus, they're not near as cute as these.  But I'm just not ready to tackle this project again so soon!  But the apron will happen for sure.  Our family has "kitchen duty" at our church next week, so it'd be nice to have it made before then.

Well, our summer weather seems to have finally arrived, so I am spending this hot evening inside in our air-conditioned house.  I have some mending that needs to be done, and I really need to get started on the little flower girl dresses for next month's wedding.  I'm still trying to decide on a pattern, and whether or not I want to smock and embroider them.  Oh...decisions, decisions!

Saturday, June 23, 2012

Lots of Sewing and New (old!) Dolls

After long hours of painstakingly hand-stitching the binding, my daughter finally finished her quilt.  ALL BY HERSELF.  I'm so proud of her.  The binding is made up of leftover strips from the fabrics she used in the quilt, and the backing is a cozy, soft flannel.  She did simple machine quilting with a decorative stitch along the seam lines.  She also made herself a new pillowcase, and the butterfly fabric ties in perfectly with the colors of her comforter and quilt.  She leaves for church camp tomorrow and is taking the quilt and pillow with her.  I know she feels a sense of pride with what she has accomplished, and is eager to show it off to her friends.  I'm looking forward to seeing what she sews next!

I sewed this little top for myself a couple of weeks ago, using a cotton gauze from my stash..  I drafted the pattern myself, since I couldn't find exactly what I was looking for.  The upper bodice is a simple peasant top with elastic in the neckline and sleeves, and the bottom portion is a slight, A-line.  It has an inset band under the bust line, which I covered with a piece of antique eyelet lace.  I also added vintage, crochet lace along the bottom.  Narrow ties cinch in the sides and tie at the back.  I love this top...it is light and summery and easy to wear.  I might even make myself another.


Today I traveled with some of my doll club friends up to a doll show a couple of hours from my home.  It is a great show, and I'm always tempted with all the wonderful antiques.  This time was no different.  I ended up with this little sweetie, a Kestner 211, otherwise known as "Sammy". He has a bisque head and a composition body.  His wig is not original, and I plan on replacing it as soon as I find a suitable, mohair wig.  He also needs new clothes.  I hope to make him a baby gown with tucks and lace, and maybe a matching bonnet, just like babies used to be dressed a hundred years ago.

Just look at that adorable face!  Can you imagine that this was once created as a play thing for children?  It makes me sad when I think of what is available for little girls to play with today.  Most dolls found in toy departments leave much to be desired, in my opinion.  Cheap materials, cartoonish faces, and dolls that represent things I'd rather not expose my young daughters to fill the shelves.  It's depressing, really.  I'm so glad that I collect dolls and have a wonderful selection of beautiful babies and little girls for my daughter to enjoy mothering.

This is "Dimples", by Horsman.  She was made in the late 1920's.  Her head and limbs are composition, and her body is cloth.  She needs a new dress and a big, frilly bonnet, also.

Dimples has blue, tin eyes that sleep, and wonderful facial coloring.

Here's a doll with a face that only a mother could love!  And I'm that mother.  I spotted her across a crowded room, and I knew I had to have her.  She is unusual in the fact that she has celluloid limbs, a hard-stuffed cloth body, and what appears to be a papier-mache head.  The seller thought her head was made of celluloid also, but I'm not so sure.   She has her original wig and sleeping, glass eyes.  Two, bottom teeth give her a kind of funny look, but I don't care--I love her!  There's just something about her that really spoke to me.  I know that not everybody (or even most people!) would appreciate a doll like this, but there was just something about her that I couldn't ignore.

I purchased this doll from a doll friend last week.  She is a newer doll, by the Swiss doll manufacturer Heidi Ott.  Isn't she pretty?  She is the same size as the popular American Girl dolls, and has vinyl limbs, head, and a cloth body.

Her face is hand painted, and her wig is human hair.  I call her "Tasha".

This is a Corolle doll named "Lily-Rose".  I picked her up at Goodwill recently, and sewed her a cute, new dress.  She will be listed on Ebay soon, since I need to build up my Paypal account again after this weekend's spending spree at the doll show!

Lily-Rose is approximately 17" tall with a vinyl head and limbs, and an interior armature which allows her to hold a pose in her legs.  Her hair is long, soft and brushable.  This doll is very sweet--I keep finding her in my daughter's bed!

This is another Corolle doll, and she is heading to Ebay, also..  She is small, maybe about 8" long, with sleep eyes.  When I found her at Goodwill she was only wearing her original, footed pants, so I decided to make her a cute, little dress to wear over the top.  The blue fabric has the cutest, pink bunnies sprinkled all over it...I love it!

I always keep my eyes open at thrift stores for potential dolls to fix up and sell.  But lots of times they look so cute in their new outfits, it's hard for me to let them go! 

I hope to start a new quilt this week.  It's been a long time since I made one, and my daughter has inspired me with hers.  Son #4 has been wanting me to make him his own quilt for quite some time, and I have the perfect cowboy print fabric in my stash.  I also have plans for a new, summer dress for myself, and oh...I almost forgot...my youngest is going to be a flower girl in her cousin's wedding this August, and I have been commissioned to make both her dress, and the one for the other flower girl.  I already have the fabric--a pretty cotton in robin's egg blue with a slight shimmer--and the bride wants it to be a simple sundress.  Easy enough.  But since I can't leave things TOO simple, I will probably add embroidery to the bodice.  Sitting next to my sewing machine right now is a library book with a pattern for a cute purse which I've been itching to make.  And then there's the pile of half-finished doll clothes which I'd like to list on Ebay.  Anybody else ever feel like there are never enough hours in the day to get all their crafting done?!?  Hopefully, I'll be back soon with some new projects!